Waterproofing your shower is the most critical step in any tile installation project, yet it’s often misunderstood or improperly executed. Without proper waterproofing, even the most beautiful tile work becomes vulnerable to water damage, mold growth, and structural deterioration. Understanding how to correctly waterproof shower walls and floors protects your investment and prevents costly repairs that can exceed the original installation cost.
How to waterproof a shower for tile
Waterproofing a shower means creating a continuous, impermeable barrier behind and beneath your tiles that prevents water from reaching vulnerable substrates like wood framing, drywall, or concrete. Many homeowners mistakenly believe that tile and grout alone provide waterproof protection, but this is dangerously false. How to waterproof shower walls properly involves applying specialized membranes or coatings to your shower’s structural surfaces before any tile installation begins. Without this crucial step, water inevitably penetrates through grout lines and tile joints, causing hidden damage that manifests as ceiling stains, floor rot, mold infestations, and structural deterioration. Professional tile installers understand that waterproofing isn’t optional—it’s the foundation of every successful shower tile installation that lasts decades without problems.
What does it mean to waterproof a shower and why it is important
Waterproofing a shower involves creating a sealed envelope around all surfaces that will contact water—walls, floor, curb, and all transitions between these elements. This protective barrier stops water from migrating beyond your tile and grout into areas where it causes irreversible damage.
Tile and grout are not waterproof materials. Ceramic and porcelain tiles resist water on their surface, but grout is porous and cracks naturally over time. Water always finds pathways through these imperfections, meaning your actual waterproofing must exist behind the tile. A properly executed shower tile installation always includes comprehensive waterproofing as its foundation layer, not as an afterthought.
How to waterproof shower floor
The shower floor experiences the most direct and prolonged water exposure in your entire bathroom. Every shower deposits gallons of water that must drain away without penetrating the substrate beneath. Understanding how to waterproof shower floor surfaces correctly prevents the most common and expensive failure points in shower construction.
Preparing the shower floor before waterproofing
Proper preparation determines waterproofing success. Your shower floor must have a consistent slope of 1/4 inch per foot toward the drain to prevent standing water. The substrate—whether mortar bed, concrete, or foam pan—must be clean, dry, and free from oils, dust, or loose material that prevents waterproofing adhesion.
All seams, transitions, and penetrations require attention before waterproofing application. For detailed guidance on this critical phase, see our guide on How to Prepare Your Shower Floor for Tile which covers substrate requirements and common preparation mistakes.
Waterproofing methods for shower floors
Liquid waterproofing membranes involve brushing or rolling on multiple coats of rubberized coating that cures into a seamless, flexible barrier. These work well for custom shower pans and irregular shapes where sheet membranes prove difficult to conform.
Sheet membrane systems use pre-formed waterproof fabric that adheres to the substrate with thinset mortar. These excel in standard rectangular showers and provide foolproof protection when installed according to manufacturer specifications.
Traditional shower liners made from PVC or CPE sit beneath a mortar bed and remain popular for their proven track record, though they require more complex installation than modern surface-applied membranes.
Common mistakes when waterproofing shower floors
Inadequate slope toward the drain creates puddles that never fully dry, accelerating grout deterioration and providing constant moisture for mold growth. Even perfectly waterproofed floors fail when water cannot drain properly.
Unsealed seams and transitions between floor and walls, around drains, and at curb locations represent the most common failure points. Every joint requires reinforcing fabric or sealant specific to your waterproofing system.
Ignoring cure times causes adhesion failure. Applying tile before waterproofing fully cures traps moisture and prevents proper bonding, compromising your entire installation.
How to waterproof a shower for tile installation
Waterproofing must be completely finished and cured before any tile installation begins. Understanding how to waterproof a shower for tile means recognizing that your waterproof membrane serves as the substrate that receives your thinset and tile—it must be compatible with these materials and fully cured to support them.
Waterproofing before installing tile
Modern waterproofing systems create a surface that accepts thinset mortar adhesion while remaining completely impermeable to water. Apply waterproofing in multiple thin coats rather than one thick layer—this ensures complete coverage without pinholes or thin spots.
Allow each coat to dry per manufacturer specifications before applying the next layer. Most systems require 2-3 coats for adequate protection. Only when the final coat has fully cured can you proceed with your shower tile installation, ensuring the membrane maintains its integrity during tile setting.
Waterproofing around drains and corners
Drain assemblies represent the most critical waterproofing challenge. The connection between your drain flange and waterproofing membrane must be absolutely watertight. Most systems provide specific drain bonding flanges or gaskets designed to integrate with their membranes.
Inside corners where walls meet walls or floors concentrate stress and movement that can tear inadequate waterproofing. Reinforce all corners with fabric tape embedded in your waterproofing material before applying topcoats. This flexible reinforcement prevents cracks from developing at these vulnerable transition points.
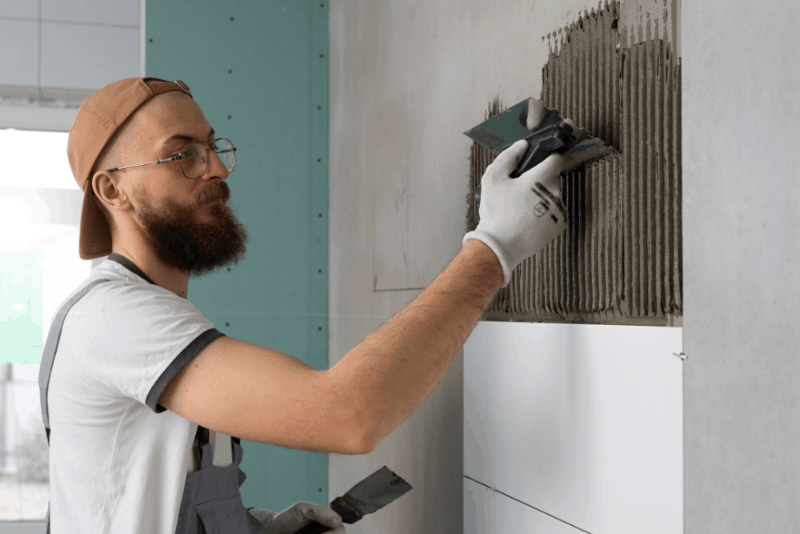
How to waterproof cement board for shower walls
Cement board provides an excellent tile substrate but offers zero waterproofing on its own. Many homeowners mistakenly believe cement board’s moisture resistance means it doesn’t need waterproofing, but cement board readily transmits water to materials behind it. Knowing how to waterproof cement board for shower walls prevents this common and costly error.
Preparing cement board for waterproofing
Seal all joints between cement board sheets with alkali-resistant mesh tape embedded in thinset mortar. Cover all screw or nail heads with thinset to prevent moisture paths. Allow joint treatment to dry completely before waterproofing.
Inside and outside corners require similar reinforcement with mesh tape to prevent cracking. Follow your waterproofing system’s specifications regarding substrate preparation—some systems require priming cement board before membrane application, while others apply directly to clean, dry board.
Different shower waterproofing systems explained
Professional tile installers select waterproofing systems based on project requirements, substrate types, and performance expectations. Understanding these systems helps you make informed decisions for your project.
Liquid waterproofing membranes
Liquid membranes brush, roll, or trowel onto prepared substrates and cure into seamless rubber-like coatings. Benefits include easy application around complex shapes, self-leveling properties that fill minor substrate imperfections, and the ability to recoat for repairs without removing tile.
Ideal applications include custom shower designs, curved walls, steam showers, and renovations where existing structures make sheet membranes impractical. Most liquid systems accommodate movement better than rigid membranes, making them preferred for wood-framed construction.
Sheet membrane systems
Sheet membranes consist of polyethylene or polypropylene fabric with waterproof coatings bonded to cement board or other substrates using thinset mortar. Installation involves cutting sheets to size, applying thinset to the substrate, embedding the membrane, and immediately troweling additional thinset over the surface.
Professionals prefer sheet systems for standard rectangular showers because they provide foolproof protection when properly installed—there’s no risk of pinholes from thin application. Pre-formed corners, curbs, and niches simplify installation for common configurations.
How long to let waterproofing cure before tiling
Liquid membranes typically require 24-48 hours between coats and 24-72 hours final cure time before tile installation, depending on temperature and humidity. Cold, humid conditions extend cure times significantly.
Sheet membranes allow immediate tile installation once the bonding thinset has set sufficiently—usually 24 hours. However, verify your specific product’s recommendations as formulations vary.
Never rush waterproofing cure times. Applying tile before complete curing traps solvents or moisture that prevent proper adhesion, leading to hollow-sounding tiles, grout cracks, and eventual tile delamination.
Testing shower waterproofing before tiling
Testing verifies your waterproofing actually works before covering it with tile, when repairs remain simple and inexpensive. This validation step is standard practice among professional tile Installation services but often skipped by DIYers and inexperienced contractors.
How to perform a shower water test
The flood test involves temporarily blocking your shower drain and filling the pan with 2-3 inches of water. Mark the water level and wait 24-72 hours, monitoring for any water level drop that indicates leakage.
During the test, inspect areas below and around the shower for moisture. Check ceiling drywall beneath second-floor showers, basement ceilings below first-floor installations, and all walls adjacent to the shower pan.
A successful test shows no water level change and no moisture appearance anywhere around the shower. Any level drop or moisture detection requires finding and fixing the leak before proceeding with tile installation. This test provides peace of mind that your waterproofing will protect your home for decades.