
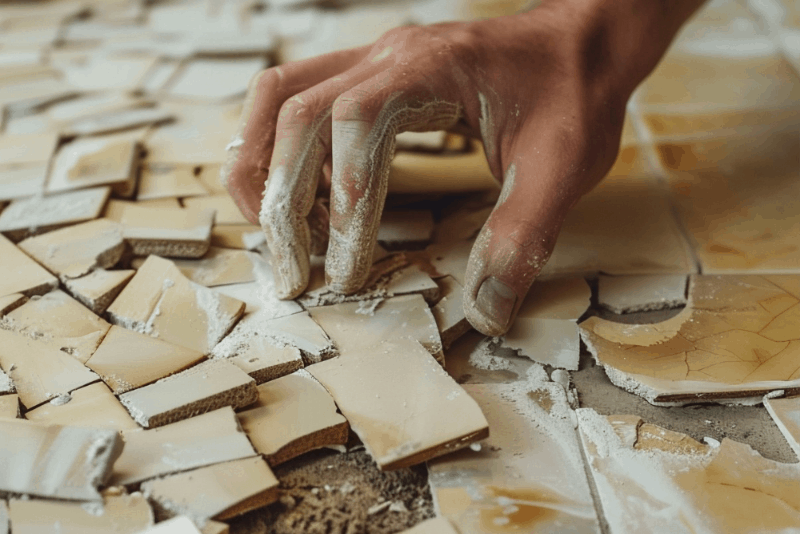
Removing old tile is one of those home projects that looks simple until the first piece won’t budge. This guide breaks the process down step by step, from gathering the right tools to prepping the subfloor for your next installation, so you can go in with a plan instead of guesswork.
Learning how to remove old tile is the first step toward a fresh, updated floor or wall, but it’s rarely as easy as it looks. Without the right preparation, tools, and technique, it’s easy to crack the subfloor, damage nearby surfaces, or leave behind adhesive that ruins a new installation. This guide walks you through everything from setting up your workspace to clearing away debris before your nex ttile flooring installation, so you know what to expect at every stage. Keep in mind this is meant as a general overview, since larger or more delicate projects are often safer left to an experienced installer.
Tools You Need to Remove Old Tile
Having the right tools on hand makes tile removal noticeably smoother, and it lowers the odds of denting the subfloor or chipping the wall behind it. Some of these are things you may already own; others are worth renting for the day.
- Hammer – used to strike the chisel and break tile into manageable pieces.
- Chisel – gets under grout lines and tile edges to start lifting sections.
- Pry bar – helps lift larger sections once a tile has been cracked loose.
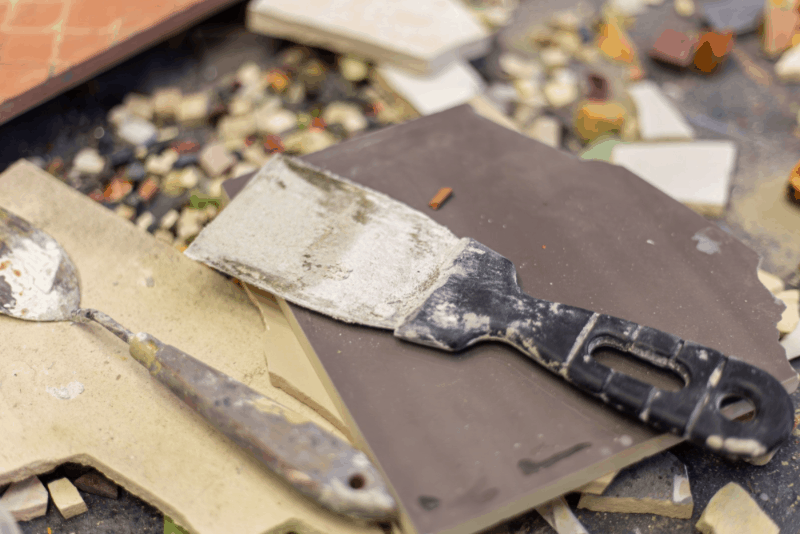
- Putty knife or scraper – clears away leftover adhesive and grout residue.
- Demolition hammer – a power tool worth renting for large floors, since it speeds up removal compared to manual tools.
- Industrial vacuum – clears dust and small debris as you work.
- Personal protective equipment – gloves, eye protection, and a dust mask for this kind of demolition.
For a small bathroom floor or a single wall section, manual tools are usually enough. Larger rooms or thick mortar beds are where a demolition hammer earns its rental fee by cutting real time off the job.
How to Prepare the Area Before Removing Old Tile
A few minutes of preparation can save hours of cleanup later, and it goes a long way toward preventing accidental damage to walls, cabinets, or plumbing nearby.
- Empty the room of furniture, rugs, and anything breakable.
- Cover nearby surfaces and fixtures with plastic sheeting or drop cloths.
- Shut off the water supply if the project is near a toilet, sink, or shower.
- Seal doorways with plastic to keep dust from spreading into other rooms.
Before picking up a single tool, it helps to look closer at what’s underneath. How do you remove old tile without surprises halfway through? Start by identifying the adhesive type, since thinset, mortar, and mastic each respond differently to a chisel, and check the subfloor for soft spots, moisture damage, or uneven areas. This matters just as much for how to remove old floor tile in a single room as it does for a full-house renovation, since skipping it usually means finding problems mid-project instead of before you start.
How to Remove Old Floor Tile Step by Step
Working through tile removal in a set order keeps the job efficient and lowers the chance of cracking tiles you didn’t mean to touch. Here’s how how to remove old floor tile typically unfolds, piece by piece.
Remove Grout Around the Old Tile
Grout holds tiles together at the edges, so it’s usually the first thing to come out. A grout saw or a rotary tool with a grout removal bit cuts through the lines without pressing on the tile face itself. If only a few tiles are being replaced, slow down around the ones staying in place, since a chipped edge on a tile you’re keeping just means an unplanned repair later.
Break and Lift the First Tile
Start in a corner or near an edge, where there’s more room to angle a chisel underneath. Tap the chisel at a low angle with the hammer until the tile cracks, then use the pry bar to lift the pieces. Working from an edge inward, rather than striking the middle of a large tile, keeps the impact controlled and reduces the chance of the chisel skipping into the subfloor.
Remove the Remaining Floor Tiles
Once the first tile is out, the rest tend to come up faster, since there’s now an opening to angle the pry bar into. Keep a steady rhythm of chiseling, prying, and clearing debris, rather than rushing several tiles at once. Some pieces, especially near walls or in older mortar beds, will resist more than others; a bit more chiseling around the edges before prying usually works better than forcing the pry bar.
Clean the Subfloor After Tile Removal
Once the tile is gone, sweep and vacuum the area thoroughly, since leftover grit can interfere with adhesive later on. This is also the moment to look closely at the subfloor itself, checking for cracks, soft spots, or dips that weren’t visible with tile in place. Catching these now, before adhesive removal, makes the rest of the project considerably easier.
How to Remove Old Ceramic Tile
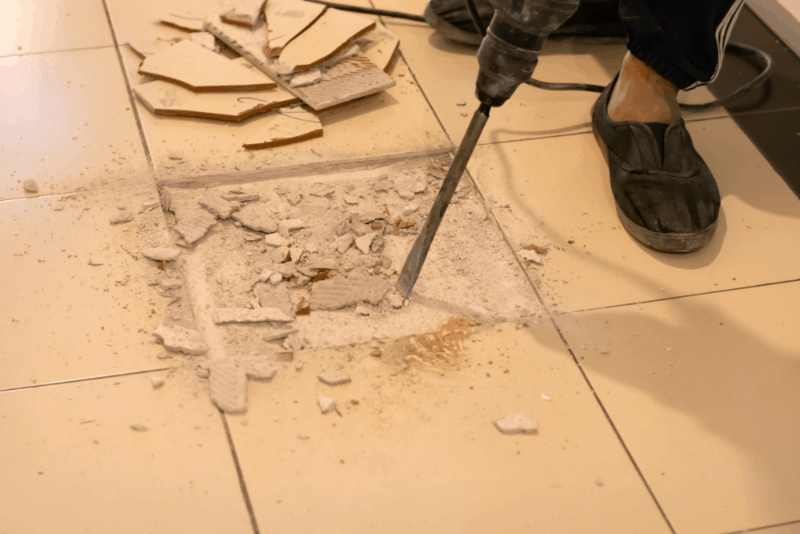
Ceramic tile behaves a little differently depending on where it’s installed, and how to remove old ceramic tile on a floor isn’t quite the same process as pulling it off a wall.
Removing Ceramic Tile from Floors
Floor-set ceramic is often bonded directly to a mortar bed, which can make it more stubborn to lift than tile set with a thinner adhesive layer. Go slowly near the edges of the room, where the subfloor is more exposed, and pay attention to how the tile releases; if large chunks of mortar come up with it, that’s a sign the bond is stronger than usual and extra care is needed to protect what’s underneath. Knowing the difference matters here too, since comparing ceramic vs porcelain tiles can help you decide what to install once the old material is gone.
Removing Ceramic Tile from Walls
Wall tile calls for a lighter touch, since the substrate behind it, often drywall or cement board, is far easier to damage than a concrete subfloor. Work in smaller sections and stop immediately if the chisel starts biting into the wall material itself rather than just the tile. Patching drywall is manageable, but it’s an extra step worth avoiding when a bit more patience gets the job done cleanly.
How to Remove Old Tile Adhesive
Removing the tile itself is only half the job. Clearing away old adhesive is what actually gets the surface ready for something new.
Scraping Thinset or Mortar
For smaller areas, a hand scraper or floor scraper with some elbow grease gets through most thinset. Larger rooms usually call for a mechanical approach, since a floor grinder or an oscillating tool with a scraper attachment covers ground faster and puts less strain on your back. The right call generally comes down to square footage: manual tools for a bathroom, rented equipment for an open living area.
Smoothing the Surface Before New Tile
Once the adhesive is gone, check the surface with a level or straightedge to spot high or low areas. Small dips can usually be filled with a leveling compound, while lingering high spots may need light grinding. Getting this step right now saves headaches later, since an uneven subfloor is one of the more common causes of cracked tile down the road.
Safety Tips When Removing Old Tile
Tile removal generates a fair amount of dust, sharp debris, and noise, so it’s worth taking safety seriously from the first swing of the hammer.
- Wear safety glasses to protect against flying tile fragments.
- Use work gloves rated for handling sharp materials.
- Wear a respirator or dust mask, especially when cutting grout or using power tools.
- Choose closed-toe, slip-resistant footwear to avoid injury from dropped tools or debris.
- Keep the space ventilated, opening windows or running a fan to help clear dust.
Older tile and grout can sometimes contain materials best handled with extra caution, so if there’s any doubt about what’s underneath, it’s worth pausing to have it checked before continuing.
Common Mistakes to Avoid When Removing Old Tile
A surprising number of flooring problems trace back to mistakes made during demolition, long before new tile ever goes down.
- Not fully removing old adhesive – leftover thinset creates an uneven base that can cause new tile to crack or shift.
- Over-hammering the subfloor – excessive force can crack or weaken the base, leading to costly repairs.
- Skipping protective gear – dust and debris exposure adds up fast, especially on larger projects.
- Ignoring the base’s condition – installing new tile over a damaged or uneven subfloor sets up problems from day one.
- Starting without a plan – jumping in without checking adhesive type or room layout often means backtracking mid-project.
Each of these is avoidable with a bit of extra planning, which is exactly where a professional eye tends to help most.
Our Professional Tile Installation Service: Quality You Can Trust
Not every project calls for a full DIY demolition, especially if the floor is large, the tile is heavily bonded, or the timeline is tight. For homeowners who’d rather skip the dust and guesswork, working with a specialized crew is often the more practical route.
Bay Tile has spent more than 15 years handling tile installation services across Northern California, led by founder Walter Argueta and a team of installers focused specifically on tile flooring installation and stonework. That kind of focused experience means the crew has already seen the tricky adhesives, uneven subfloors, and stubborn ceramic tile that can turn a simple job into a long weekend.
Leaving both the demolition and the installation to a dedicated team usually means fewer surprises. The right tools are already on hand, the subfloor gets checked properly, and the new tile goes down on a surface that’s actually ready for it. Bay Tile works with homeowners throughout Roseville, Sacramento, El Dorado Hills, Folsom, Granite Bay, and Rocklin, handling everything from small bathroom updates to full-home flooring projects.
If removing old tile sounds like more than you’d like to take on alone, reaching out for an evaluation is a simple way to find out what the project actually involves, and what it would take to get it done right.
FAQs About How to Remove Old Tile
Here are some of the questions homeowners ask most often before starting a tile removal project.
What is the easiest way to remove old tile?
For small areas, the simplest method is scoring the grout lines, prying up one tile at a time with a chisel and hammer, then scraping away the leftover adhesive. Larger areas move faster with a rented demolition hammer, but the basic approach of grout first, then tile, then adhesive stays the same either way.
How do you remove old floor tile without damaging the subfloor?
Work at a low angle with the chisel instead of striking straight down, start from an edge or corner, and avoid excessive force once a tile has already cracked loose. Checking the subfloor for soft spots before you begin also helps you know which areas need a gentler touch.
Can I remove old ceramic tile myself?
Small floor or wall sections are usually manageable as a DIY project with basic tools and some patience. Larger rooms, tile set in thick mortar, or any area near plumbing are generally better handled by a professional, since the risk of subfloor or wall damage rises along with the size of the job.
What tools do I need to remove old tile?
A hammer, chisel, pry bar, and scraper cover most small jobs. For larger floors, a demolition hammer and an industrial vacuum speed things up considerably and cut down on cleanup time.
How long does it take to remove old tile?
Timing depends mostly on the size of the room, the type of adhesive used, and whether the tile is on a floor or wall. A small bathroom floor might take a few hours, while a larger room with strongly bonded mortar can stretch into a full day or more.
Do I need to remove old tile adhesive before installing new tile?
Yes. Leftover adhesive creates an uneven surface that can prevent new tile from bonding properly. A clean, level base is one of the biggest factors in how long a new installation actually lasts.
Is it better to remove old tile or tile over it?
Tiling over existing tile can work if the current surface is flat, well-bonded, and structurally sound, but it also raises the floor height and can trap existing problems underneath. Removing the old tile first is generally the safer choice when the subfloor’s condition is uncertain or shows visible damage.