
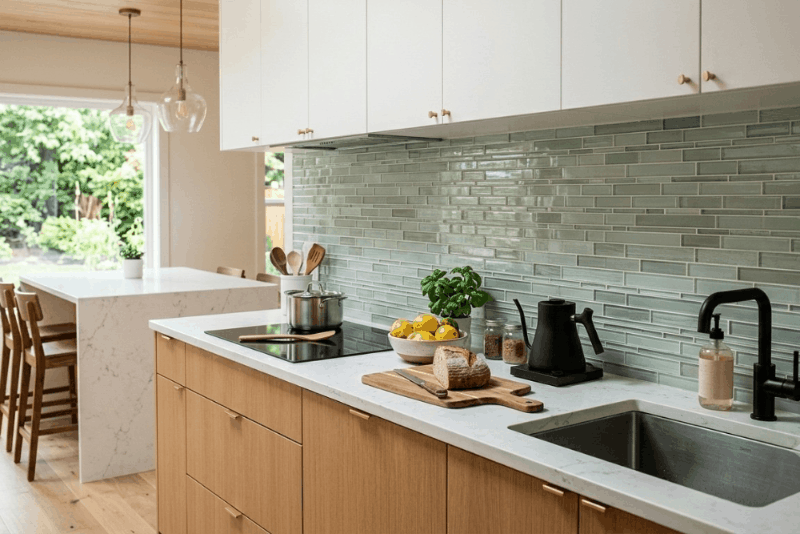
Glass tile can make a kitchen feel finished in a way few other materials do, but it doesn’t forgive sloppy technique the way ceramic sometimes does. This guide walks through the full process, so you know what to expect before the first tile goes up.
If you’re wondering how do you install glass tile backsplash panels without cracking them or ending up with crooked lines, the short answer comes down to precision, the right materials, and a bit of patience. Glass reacts differently than ceramic or porcelain, so a clean, lasting finish depends on more than just picking a pattern you like. This guide covers everything involved in how to install glass tile, from tools and wall prep to cutting technique, grout application, and the mistakes that trip up most first-timers. It’s written with DIY in mind, though some kitchens end up better served by hiring the job out, especially if the goal is a modern kitchen backsplash with sharp, professional lines.
What You Need to Install a Glass Tile Backsplash
Before any adhesive gets mixed, it helps to have every tool and material on hand, since stopping mid-project to run to the store rarely helps the final result. A full kitchen tile installation goes more smoothly when everything below is gathered and organized ahead of time.
Essential Tools
A handful of tools make the difference between a clean install and a frustrating one.
- Notched trowel – spreads adhesive at a consistent, even thickness.
- Glass tile cutter – scores and snaps glass cleanly without shattering it.
- Level – keeps rows straight as you work across the wall.
- Spacers – hold consistent gaps between tiles for even grout lines.
- Tape measure – confirms layout and cut sizes before committing.
- Grout float – presses grout into joints without smearing it across the tile face.
- Sponge – wipes away excess grout during cleanup.
Recommended Materials
Beyond the tools, a short list of materials rounds out the project.
- Glass tile in the chosen pattern and color.
- White thinset adhesive, which won’t show through translucent glass.
- Grout, sanded or unsanded depending on joint width.
- Sealer, when the grout type calls for one.
- Backer board or membrane, for walls that need extra support or moisture protection.
Using materials made to work with glass matters here more than with other tile types, since the wrong adhesive or grout can discolor or damage the surface once it cures.
Choosing the Right Adhesive and Grout
White thinset is generally the better call for glass tile, since grey adhesive can shadow through lighter or translucent pieces and change the final color. For grout, sanded works fine for joints greater than 1/8 inch, while unsanded is gentler on delicate glass edges in narrower joints. Both should be labeled as compatible with glass mosaics before purchase, since standard formulas aren’t always suited to the material.
How to Prepare the Wall for Glass Tile
Wall prep matters just as much as the tile itself, and skipping steps here is one of the more common reasons a backsplash fails early. This holds true whether you’re tiling a small accent strip or handling a backsplash behind stove installation, where grease and heat add a few extra considerations.
Clean and Repair the Surface
Start by clearing away grease, dust, and any loose debris, since adhesive won’t bond properly to a dirty wall. Patch cracks and correct uneven spots before moving forward, since a smooth, stable surface underneath makes every later step easier and helps the finished tile sit flush.
Measure the Backsplash Area
Measure the full area carefully, factoring in outlets, corners, and any obstacles the tile needs to work around. Add roughly 10 percent extra to your material total to cover cuts and waste, and double-check awkward corners before finalizing how much tile to buy.
Plan the Tile Layout
Before any tile touches the wall, map out the layout on paper or with a dry run. Decide whether to start from the center of the wall or an end point, and plan where cuts will land so they end up in less visible spots rather than dead center.
How to Apply Glass Tile Backsplash
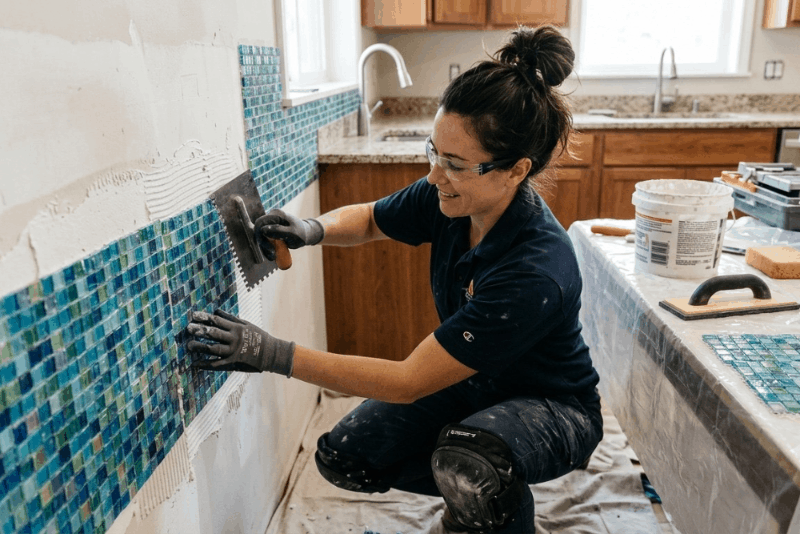
This is the core phase of the project, and following the right order here does more for the final look than almost anything else. Here’s how to apply glass tile backsplash pieces once prep work is finished.
Mark the Installation Guidelines
Use a level to draw horizontal and vertical guidelines on the wall before applying any adhesive. Starting from a centered guideline usually creates a more balanced look, though starting from one edge can work fine for smaller, simpler areas.
Mix and Apply the Adhesive
Mix the thinset to a smooth, peanut-butter consistency, then spread it with the flat side of the trowel before combing it with the notched edge. Keep the layer even, working in small sections so the adhesive doesn’t skin over before tile gets pressed into it.
Position the Glass Tiles
Press each sheet or piece into the adhesive with steady, even pressure, checking alignment with the level as you go. Working row by row, rather than jumping around the wall, helps keep everything continuous and reduces the chance of drifting off-line.
Use Spacers for Even Joints
Spacers keep every joint the same width across the entire installation, which matters more with glass than with most other materials since inconsistent gaps are more visible under light. Consistent spacing also makes the grout step considerably easier once you get there.
How to Install Glass Tile Around Outlets and Corners
These spots demand more precision and a bit more planning than a flat, open section of wall.
Measure and Mark the Tile Cuts
Before cutting anything, create a paper template of the outlet or corner and transfer those measurements onto the tile. Double-check every measurement against the actual space before making a cut, since glass doesn’t offer much room for correction afterward.
Cut Glass Tile Safely
Score the tile firmly with a glass cutter along the marked line, then snap it cleanly using steady, even pressure. A wet saw with a glass-rated blade handles more complex cuts with less risk of chipping than a manual score-and-snap approach.
Install Tiles Around Electrical Outlets
Always cut power to the outlet before working around it, and use outlet extenders if the added thickness of the tile and adhesive brings the box below the new surface. Precise cuts matter here both for appearance and for keeping the cover plate sitting flush once everything is finished.
How to Grout a Glass Tile Backsplash
Grout is what finishes the installation and protects every joint from moisture and grime going forward.
Choose the Best Grout for Glass Tile
Match the grout color to the overall look you’re after, since a contrasting grout emphasizes each individual piece while a matching tone creates a more blended, continuous surface. The joint width and mosaic pattern chosen earlier will determine whether sanded or unsanded grout makes more sense here.
Apply the Grout Correctly
Spread grout diagonally across the joints using the float, working it firmly into each gap rather than skimming the surface. Wipe away the bulk of the excess with a damp sponge shortly after application, then let it firm up before a more thorough cleaning pass.
Remove Grout Haze from Glass Tile
Once the grout has set for the recommended time, a light haze often remains on the glass surface. A slightly damp sponge followed by a dry microfiber cloth usually clears it without scratching, though it’s worth waiting the full cure time before scrubbing too aggressively.
Common Glass Tile Installation Mistakes
A handful of recurring mistakes account for most glass backsplash problems.
Using the Wrong Adhesive
Grey adhesive or a formula not rated for glass can discolor the tile or fail to bond properly, leading to pieces that eventually loosen or shift.
Applying Too Much Pressure
Pressing too hard while setting tiles can push adhesive out from behind the piece and throw off alignment with its neighbors, creating an uneven surface once everything sets.
Cutting Glass Tile Incorrectly
Rushing a cut or using a blade not meant for glass often leads to chipped edges or cracked pieces, which usually means starting that cut over from a fresh tile.
Grouting Before the Adhesive Dries
Grouting too soon can disturb tiles that haven’t fully set, shifting their position or trapping moisture behind the adhesive before it’s had a chance to cure properly.
Professional Glass Tile Backsplash Installation Services
Glass leaves very little margin for error. Irregular cuts, uneven joints, or tiles that were never quite pressed evenly into the adhesive tend to show up clearly once the light hits them.
That’s where an experienced installation team makes a real difference, particularly for anyone who’d rather skip the trial and error. Our tile installation services bring precise cuts, uniform joints, and a finish that holds up well beyond the first year, handled by installers who work with glass regularly enough to know its quirks. Homeowners in Roseville, Sacramento, El Dorado Hills, Folsom, Granite Bay, and Rocklin planning a backsplash upgrade often find it’s worth a conversation before buying materials, just to get a sense of what the project actually involves.
Frequently Asked Questions About Glass Tile Installation
Here are some of the questions that come up most often when planning a glass tile backsplash.
Can You Install Glass Tile Directly on Drywall?
Yes, as long as the drywall is clean, dry, and free of damage. Painted or glossy surfaces should be lightly sanded first so the adhesive has something to grip, and any grease near a stove area needs to be fully removed before tiling begins.
What Adhesive Should You Use for Glass Tile?
White thinset adhesive is the standard choice, since it won’t discolor translucent or lighter glass tiles the way grey adhesive can. Confirm the product is labeled as glass-compatible, since regular thinset formulas aren’t always suited to the material’s unique surface.
Do You Need to Seal Glass Tile?
Glass itself typically doesn’t need sealing, since it’s non-porous by nature. Grout is a different story, especially sanded grout in wet areas, which often benefits from a sealer to resist staining and moisture over time.
How Long Should Glass Tile Dry Before Grouting?
Most thinset adhesives need 24 to 48 hours to cure fully before grouting begins. Checking the specific product’s instructions is worth the extra minute, since cure times can vary based on humidity, temperature, and the adhesive brand used.